How to Edit Webinar Recordings
October 2024
·
4 min read


Webinars are a great source of valuable information and insights. But once the live event is over, what happens to all that great content? Too often, it sits unused, gathering digital dust.
To maximize the value of our webinar even after the event is over, we often edit it to repurpose the content or create engaging resources for our audience.
But creating high-quality content with hour-long webinars takes time - time you might not always have.
You just want to be able to quickly turn your latest webinar into:
-
Short, engaging clips for social media
-
A series of focused blog posts
-
A comprehensive resource for your sales team
But the problem with traditional editing is, those editors are complex to use, often requiring specialized skills and hours of painstaking work. It's enough to make you want to leave that webinar footage untouched.
With a fresh approach to video editing, all of this becomes not just possible, but easy.
At Reduct.Video, we believe there's a better way. We have streamlined the editing process from the ground up, making it as simple as editing a document.
By making it easy to repurpose your recording, Reduct helps you extract every ounce of value from your webinar.
Here's how content creators and editors are using Reduct.Video's advanced features to review and edit their video content and webinars:
Upload your webinar recording to Reduct.Video
As soon as you upload your recording to Reduct, our platform automatically generates highly accurate transcripts of your recordings within minutes.
This interactive transcript syncs seamlessly with your video, enabling you to navigate your webinar content quickly.
Click on any word in the transcription to instantly jump to a specific moment in the recording. This eliminates the need for you to rewatch the entire webinar to get to the key moment.
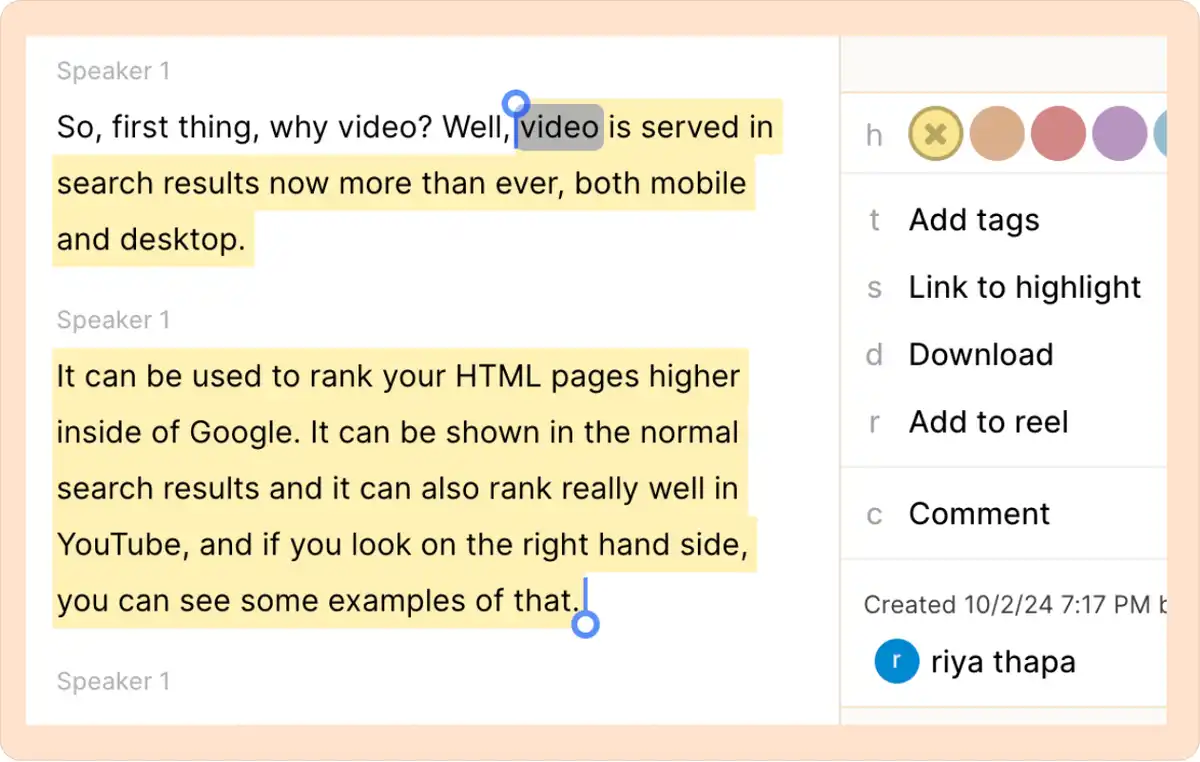
Edit your video by simply editing the text and highlight key moments
Reduct allows you to make changes to the generated AI transcript in cases of any spelling errors, or capitalization mistakes.
These edited transcript changes are then auto-reflected in the captions of your webinar video.
As you read down through the transcript, you can easily highlight key sections to emphasize valuable insights and testimonials.
For instance, a marketing expert might share real-time examples of successful campaigns, discuss the latest trends, and offer actionable tips that participants can immediately apply to their own businesses.
By highlighting sections of text from your transcript, Reduct makes it easier for you to repurpose your webinar content into a blog post or small bits of testimonials.
It's that simple. No timeline wrestling, no complex interfaces - just intuitive, text-based editing that anyone can master.

More than just editing
Reduct.Video isn't just about making editing easier (though it certainly does that). It's about helping you get more value from your webinars too. With our tool, you can:
Search through hours of footage to find exactly what you need
Our text-based video editor converts your webinar recordings into searchable transcripts, allowing you to locate specific content with precision.
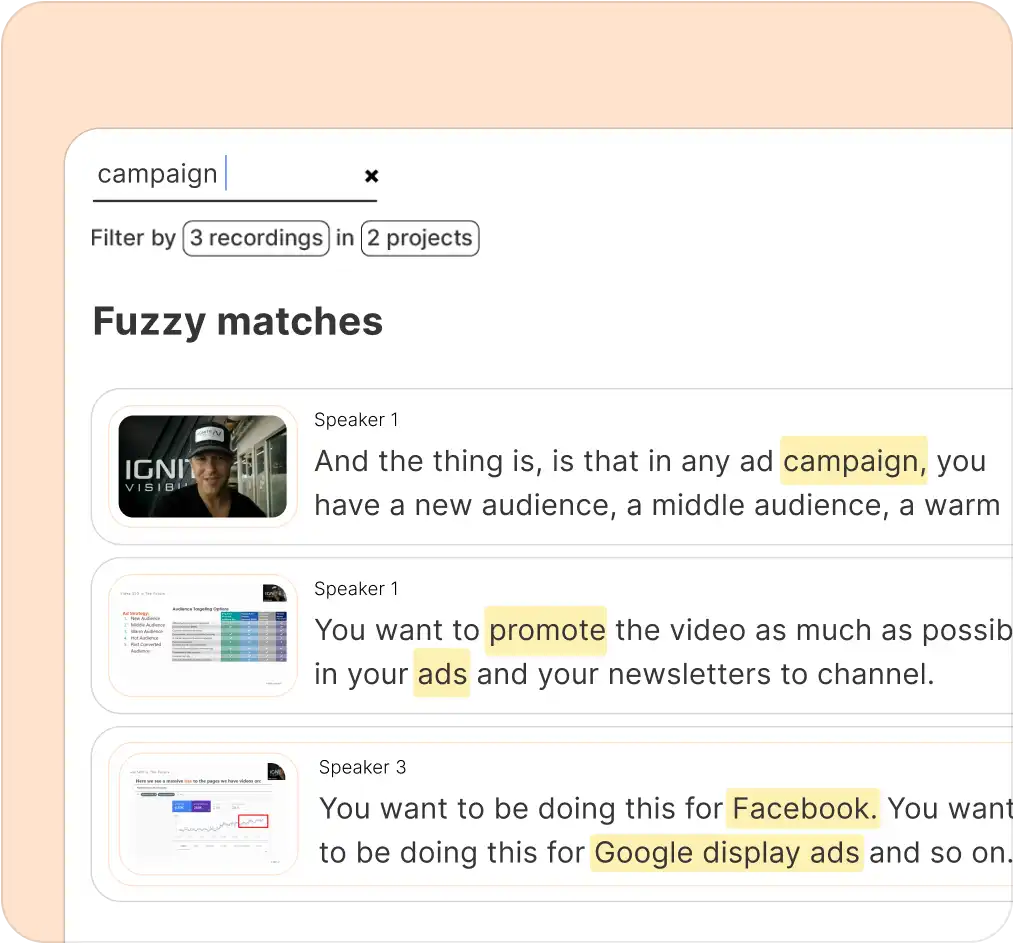
Whether you're searching for a particular question from the Q&A or a key point from the presentation, Reduct's advanced ‘Fuzzy search’ analyzes your transcripts for concepts and themes suggesting you with related terms to guide your search.
For instance, if you're editing a webinar on digital marketing strategies and you search for "campaign," related to marketing, the fuzzy search will not only give you the exact match but also show parts of the webinars that includes related terms like ‘promote,’ ‘ads’, ‘strategy’ or ‘marketing’.
Quickly create reels of key moments
After searching for key moments in your webinar footage, you can seamlessly create engaging reels.
With Reduct you can easily transform lengthy recordings into concise, shareable video clips by simply selecting the portion of your transcript you want to turn into a reel, then clicking the 'Add to Reel' option.
Simply drag and drop your chosen reels into the editor, where you can refine the sequence and create impactful clips.
This streamlined process eliminates the complexity of traditional timeline editors, enabling you to craft compelling narratives quickly.
You can also add captions to make your reels more accessible.
Collaborate with your team in real-time
Reduct simplifies collaborative editing by allowing your team to work on webinar footage in real-time.
You can invite multiple team members to simultaneously make edits, add comments, and provide feedback, significantly speeding up your webinar editing process.
Real people, real results
Don't just take our word for it. Here's what Rob Volpe, CEO at Ignite 360, had to say:

Rob Volpe, CEO at Ignite 360
"Without Reduct, It would have been so difficult to bring the stories to life."
Read our case study to know how we helped Ignite 360 navigate, search, and create impactful reels within hours of video recordings.
Unlock the full potential of your webinar with Reduct
With the right tool, you can efficiently transform your webinars into valuable assets and drive results, all while saving you precious time.
Reduct helps you unlock the potential to edit and repurpose your webinar for greater good. So why let your webinar recordings gather dust?
With Reduct, transform your webinar into a powerhouse that keeps working for you, long after the live event has ended.
Ready to see what Reduct can do for you? Let's unleash the power of your webinars together today.